How to Design and Grade a Knitted Set-In Sleeve
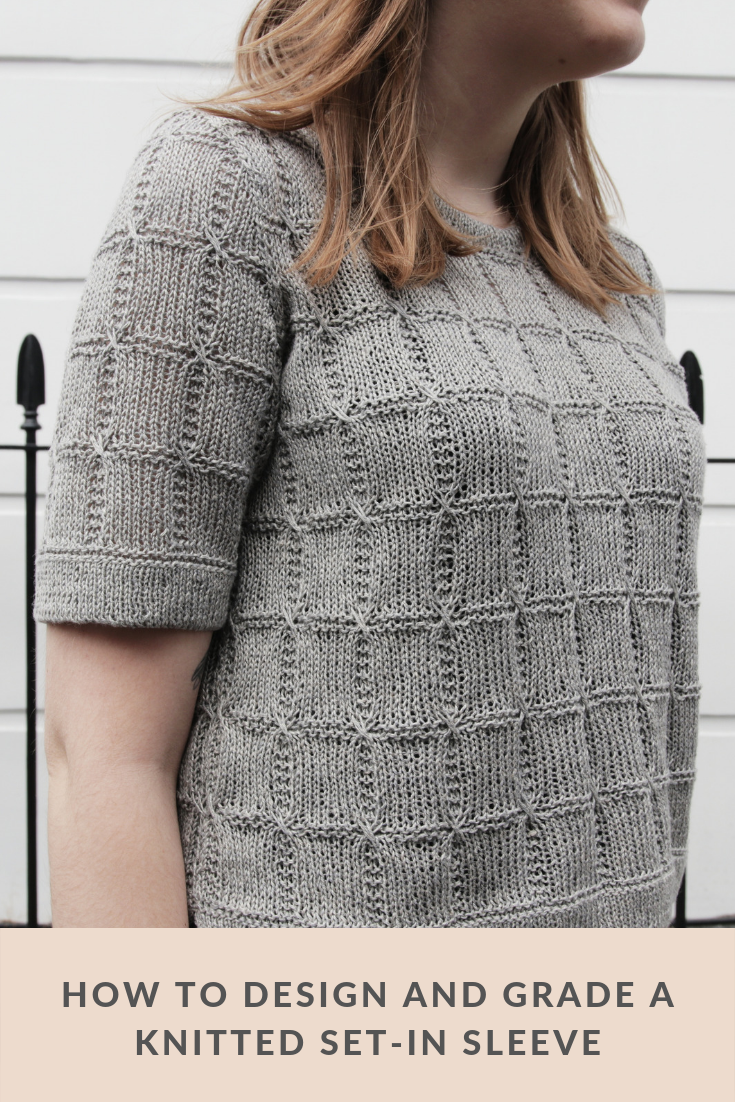
Fragment was the first of my designs with a traditional set-in sleeve.
What is the sleeve shape that you are most intimidated by designing? If you answered with the set-in sleeve, you are not alone. A set-in sleeve is the most classic sleeve shape, yet it is the one that knitting pattern designers have the most trouble with.
Understandably so, of course. A traditional set-in sleeve is knitted flat, yet it needs to become three-dimensional when seamed. There is a fair amount of mathematics involved in getting it there, which is why it can be so scary to designers - particularly those who have just started designing knitting patterns.
A set-in sleeve can go wrong very easily too. Make the sleeve cap too long and you will have too much fabric to ease into the armhole. Make it too short and you will not have enough fabric to fit into the armhole.
In this blog post, I will walk you through how I calculate and grade my set-in sleeves using any spreadsheet and a size chart (download my free one below, if you haven’t already!) Throughout this post, I will show you the exact spreadsheet formulas that I use so that you can copy and paste them into your own design spreadsheets.
As you might imagine, this is a bumper blog post, so grab a cup of tea and settle in!

Whilst I haven’t designed a ton of them (just my Fragment t-shirt), set-in sleeves are my absolute favourite sleeves to wear. They fit really nicely around the shoulder, if you get it right, and feel very comfortable.
I think some people avoid designing them because they are typically knitted flat and that style of knitting is not so popular at the moment. However, there are ways of knitting a set-in sleeve from the top-down (I did that in my Trust Me sweater design), which I can cover in a future blog post, if you’d like. For the purposes of this blog post, I’ll be showing you how to design them flat, assuming that you are knitting from the bottom up.
Just so you know, I always calculate my measurements in cms first and then convert them into inches. All of my cms are rounded to the nearest 0.5 and my inches are rounded to the nearest 0.25. I’ll be using my size 5 (XL) as an example throughout this blog post. Remember to drag the formulas across all sizes!
How to shape and grade the armholes of a Set-In Sleeve Sweater
I am going to start by teaching you how to shape the armhole in which you will eventually set-in your sleeves. At the armholes, you are essentially just transitioning from the garment’s bust width to the cross back width (AKA your shoulder tip-to-tip width). The armhole curve is worked at the bottom of the armhole and then the rest of the armhole is worked straight
Set Up Your Spreadsheet
If you haven’t already, put the following body measurements in your spreadsheet, using your size chart:
Bust circumference
Cross back (shoulder tip to tip) width
Upper arm circumference
Armhole depth
Now, we will use those body measurements to calculate our finished garment measurements and add them to the spreadsheet.
You start the process by taking your body measurements for all sizes and use them to calculate your garment’s finished measurements.
Bust Width
My garment example has 5cm/2” of positive ease at the bust circumference, so we will use the following calculation to figure out the bust width in cm. Because my garment uses positive ease, we are adding the ease to the bust circumference before halving it, however if you are using negative ease, you will subtract the ease from the bust circumference instead.
(Bust circumference + Ease) / 2 = Bust Width
Spreadsheet formula: =MROUND((bust circumference in cm+ease in cm)/2,0.5)
The above formula calculates the bust width and rounds it to the nearest multiple of 0.5 cm. Replace bust circumference in cm and ease in cm with the appropriate cell references. For example, in my size 5 (XL) cell, it says =MROUND((J5+5)/2,0.5) which means =MROUND((114+5)/2,0.5). This gives us a finished bust width of 59.5 cm.
Now, we will convert our bust width in cms into inches (rounded to the nearest multiple of 0.25”) using the following spreadsheet formula: =MROUND(CONVERT(bust width in cm, "cm", "in"),0.25)
Replace bust width in cm with the appropriate cell reference, e.g. for size 5 (XL), I used =MROUND(CONVERT(J14, "cm", "in"),0.25) to give me a bust width of 23.5”.
Calculate the bust width in cm and inches for all sizes by putting the formulas above in the cells for your first size, then drag them across all of the sizes. The spreadsheet will do all of the mathematics for you automatically. If you don’t know how to drag formulas across the sizes, I cover that in my blog post, How to Grade Knitting Patterns Using a Spreadsheet.
Cross Back (Shoulder Tip to Tip) Width
Do not add any ease onto your shoulder measurements. For a set-in sleeve sweater, the section where the sleeve cap meets the shoulder seam should sit directly on the tip of the shoulder. It if extends past that point, the sweater will look ill-fitting or even start looking like a drop-shoulder!
This finished garment measurement should be the same as the cross back in the size chart.
Upper Arm Width
My garment example uses 2.5 cm/1” of positive ease at the upper arm, so we will use the following calculation to figure out the finished garment measurement for the upper arm width in cm, rounded to the nearest multiple of 0.5.
Upper Arm Circumference + Ease = Upper Arm Width
Spreadsheet formula: =MROUND(upper arm circumference in cm+ease in cm,0.5)
Replace upper arm circumference in cm and ease in cm with the appropriate cell references for that size, so for example, in my size 5 (XL) cell, it says =MROUND(J7+2.5,0.5) which means =MROUND(33+2.5,0.5). This gives me a finished upper arm width measurement of 35.5 cm.
You can convert this measurement into inches using the same method I showed you for the bust width. Then, drag the formulas across all sizes and the spreadsheet will automatically grade them for you.
Armhole Depth
I’m giving my garment 4cm/1.5” of positive ease at the armhole, so I will use the following calculation to work out my finished garment’s armhole depth in cm, rounded to the nearest multiple of 0.5.
Body Armhole Depth + Ease = Garment Armhole Depth
Spreadsheet formula: =MROUND(armhole depth in cm+ease in cm,0.5)
Replace the armhole depth in cm and ease in cm with the appropriate cell references. For example, for size 5 (XL) I used =MROUND(J8+4,0.5) which means =MROUND(21.5+4,0.5) to give me an armhole depth of 25.5 cm.
Convert your armhole depth from cm into inches using the formula I showed you for the bust width and drag them across all of the sizes to grade them.
Stitch and Row Gauge
Add your stitch and row gauge per cm to the spreadsheet. My example gauge is 22 sts x 30 rows per 10 cm, so I know that mine is 2.2 sts and 3 rows per 1 cm.
Making the Initial Armhole Calculations
Now that you have set up your spreadsheet with all the information that you will need, you can start figuring out your the armhole shaping.
Bust Width in Stitches
First, calculate number of stitches in your bust width, rounded to the nearest even number.
(Bust width in cm * Stitch gauge per cm) + 2 selvedge stitches = Bust width in sts
Spreadsheet formula: =MROUND(bust width in cm*stitch gauge per cm,2)+2
Replace bust width in cm and stitch gauge per cm with the appropriate cell references. For example, my size 5 (XL) cell says =MROUND(J14*J21,2)+2 which means =MROUND(59.5*2.2,2)+2. This gives me a bust width of 132 stitches. Drag this formula across all of the sizes.
This formula is telling the spreadsheet to multiply your bust width in cm by your stitch gauge per cm and then round it to the nearest even number. Then, it is adding on 2 additional selvedge stitches, which will be used when setting the sleeve cap into the armhole.
Cross Back in Stitches
Now, we will calculate number of stitches in your cross back and round it to the nearest even number. We calculate this in the same way that we did the Bust Width in stitches.
(Cross back in cm * Stitch gauge per cm) + 2 selvedge stitches = Cross back in sts
Use the same spreadsheet formula as we used for the Bust Width and drag it across all of the sizes.
Stitches to Remove at Each Armhole
As I mentioned earlier on in this guide, we are transitioning from the Bust Width to the Cross Back Width to create our armhole. To start figuring out this shaping, we need to find out the total number of stitches we need to remove at each armhole using the following calculation:
(Bust width in sts - Cross back in sts) / 2 = Number of sts to remove at each armhole
Spreadsheet formula: =(bust width in sts-cross back in sts)/2
Replace bust width in sts and cross back in sts with the appropriate cell reference, e.g. in the size 5 (XL) cell, I used =(J26-J27)/2 which means =(132-192)/2 to give me a result of 20. Now, I know that I need to remove a total number of 20 stitches at each armhole in my shaping.
Calculate Initial Bind-Off
The initial bind-off in the armhole typically measures 1.5-2.5cm, depending on the size of the garment. Sometimes I go a little narrower or wider if I’m struggling to make the rest of the shaping work out. I tend to use a wider bind-off on larger sizes and a narrower one on smaller sizes.
Decide on how wide you want the bind-off to be for each size and then use the following calculation to figure out how many stitches that will be:
Desired width of bind-off in cm * stitch gauge per cm = Initial Bind-Off
Spreadsheet formula: =MROUND(desired width of bind-off in cm*stitch gauge per cm,2)
Replace desired width of bind-off in cm and stitch gauge per cm with the relevant cell reference. For example, in size 5 (XL) I used =MROUND(2*J21,2) which means =MROUND(2*2.2,2). The MROUND function rounds the calculation to a multiple of 2, so that we always end up with an even number. This gave me an initial bind-off of 4 stitches. It’s not necessary to use an even number for your bind-offs, but I prefer to have them when I can.
Work Out Stitch Count After Bind-Off
I always like it in patterns when they tell you your new stitch count on every row that the stitch count changes. I do the same when I’m calculating my knitting patterns in a spreadsheet. Because of the initial bind-off, we have a new stitch count, so I work it out using this calculation:
Bust width in sts - (Initial bind-off * 2) = Stitch count after initial bind-off
Spreadsheet formula: =bust width in sts-(initial bind-off in sts*2)
Replace bust width in sts and initial bind-off in sts with the appropriate cell reference. For my size 5 (XL), I used =J26-(J29*2) which is =132-(4*2) to get me an updated stitch count of 124 stitches.
Remaining Stitches to Decrease
Now that we have done our initial bind-off, all that’s left to do is work the decreases. Work out the remaining number of stitches to decrease at each armhole using this calculation:
Sts to remove at each armhole - Initial bind-off = Sts remaining to dec at each armhole
Spreadsheet formula: =sts to remove at each armhole-initial bind-off
This formula tells the spreadsheet to subtract the initial bind-off from the stitches to remove at each armhole, so that we can find out how many stitches remain that need to be decreased. For example, in my size 5 (XL), the formula is =J28-J29 which means =20-4, so I have 16 sts remaining that need to be decreased.
Estimate Rows in Armhole Shaping
The armhole shaping, excluding the initial bind-off, is usually worked over the first 4-7.5 cm of the armhole. The deeper the overall armhole and the more stitches that need to be decreased, the longer I make the section of armhole shaping.
Keeping that in mind, estimate how many cms of armhole shaping you want to use for each size and then use the following calculation to figure out how many rows that will be, rounded to the nearest even number. This estimation may be adjusted later on in the process, but it’s a good place to start.
Desired length of armhole shaping in cm * row gauge per cm = rows in armhole shaping
Spreadsheet formula: =MROUND(desired length of armhole shaping in cm*row gauge per cm,2)
For my size 5 (XL), I decided to work my armhole shaping over 6 cm, so I wrote =MROUND(6*J22,2) which means =MROUND(6*3,2). Based on this estimation, I will try to work all of my armhole shaping over a total of 18 rows.
Decrease Rate for Armhole Shaping
In her fantastic book, Knitwear Design Workshop, Shirley Paden likes to use several sections of bind-offs in the armhole, but I don’t think it gives a smooth enough finish, so I prefer to use only one bind-off and then use decreases to shape the rest of the armhole.
I’ll be honest - I don’t have a tried and true formula for this next part of the process yet and find that it takes me a bit of trial and error to get the numbers working in this section. If you have any other methods, please feel free to share it with our community, The Sisterhood, in the comments section!
Here is my messy, trial and error process to working it out:
First Set of Decreases
I initially plan to decrease 1 stitch at each side of every row for half the length of the armhole shaping, rounded to the nearest even number.
Estimated Rows of armhole shaping / 2 = Number of rows to dec 1 at each side
Spreadsheet formula: =MROUND(estimated rows in armhole shaping/2,2)
For example, in my size 5 (XL) cell, I write =MROUND(J32/2,2) which means =MROUND(18/2,2). Based on that, I plan to decrease 1 stitch at each side of every row for 10 rows.
Stitch Count Update
As usual, I then work out my new stitch count once those decreases have been worked.
St count after initial bind-off - (rows to dec at each side * 2) = St count after first set of decs
Spreadsheet formula: =stitch count after initial bind-off-(number of rows to dec 1 at each side*2)
This formula tells my spreadsheet to multiply the number of rows I am decreasing 1 at each side for by 2 - this tells me the total number of stitches I am decreasing overall. Then, I subtract that number from my stitch count at the initial bind-off. For example, in my size 5 (XL), I wrote =J30-(J33*2) which means =124-(10*2). This gives me an updated stitch count of 104 stitches.
Estimated Rows Remaining in Armhole Shaping
After that, I work out how many rows are left in the armhole shaping using this calculation.
Estimated rows in armhole shaping - Rows used already in armhole shaping = Rows remaining in armhole shaping
Spreadsheet formula: =estimated rows in armhole shaping-rows used in first set of armhole decreases
For my size 5 (XL), I used =J32-J33 which means =18-10 to give me a result of 8 rows. This is how many rows I could work my final set of decreases over.
Second Set of Decreases
For my second set of decreases, I usually decrease 1 stitch at each end of every second row. Based on this, we know that the total number of rows worked in this section is also the number of stitches decreased over the course of this shaping.
For example, if I decrease 1 stitch at each end of every second row for the next 8 rows, I will have worked 4 decrease rows. On every decrease row, I decrease 2 stitches. If I decrease 2 stitches 4 times, that will be a total of 8 stitches decreased overall, which is the same as the number of rows I have worked.
Stitch Count Update
Now, we will find out the resulting stitch count if we follow this shaping using this calculation:
St count after first set of decs - number of sts dec’d in second set = final st count after armhole shaping
Spreadsheet formula: =st count after first set of decs-number of sts dec’d in second set of decs
So, for my size 5 (XL), I wrote =J34-J35 which means =104-8. This gave me a final stitch count of 96 sts.
Check the Numbers
After estimating all of this shaping, it’s time to check whether it actually meets our estimated rows of armhole shaping and desired stitch count. Spoiler alert: most of the time, it won’t meet both of them!
Check your armhole length with this spreadsheet formula: =(rows in first set of decs+rows in second set of decs)=estimated rows in armhole shaping.
For my size 5 (XL), I wrote =(J33+J35)=J32 which means =(10+8)=18. The cell responded with “TRUE”.
If your cell says TRUE, your armhole shaping uses the same number of rows as you initially estimated.
If your cell says FALSE, your armhole shaping uses more or less rows than you initially estimated.
Now, check whether your stitch count after completing the armhole shaping matches the cross back width in stitches using this spreadsheet formula: =stitch count after completing armhole shaping=cross back width in sts
For my size 5 (XL), I typed in =J36=J27 which means =96=92. Of course, the reading came back FALSE!
If you get TRUE readings for both row and stitch count, that size’s armhole shaping is correct and doesn’t need adjusting.
What to do if You Get a FALSE
More than likely, you’ll get FALSE readings for almost all of your stitch counts - don’t worry. This is totally normal! All you need to do is go back to adjust the number of rows in the first set of decreases. I prefer to use an even number of rows throughout, but will occasionally work an odd number of rows if it makes the numbers work out.
If your final stitch count after completing the armhole shaping is more than the cross back width in stitches, try adding more rows to the first set of decreases.
If your final stitch count after armhole shaping is less than the cross back width in stitches, try using fewer rows in the first set of decreases.
You might find that, for some sizes, it is impossible to get a true reading for both stitch and row counts. In that case, I tend to skip one of the sections of shaping and adjust the number of rows used in the armhole shaping so that I can reach the correct stitch count. You can always work more or less rows in your armhole shaping than you originally estimated, as long as the overall depth of the armhole remains the same.
In my size 1 (XS), I didn’t have many stitches to decrease at each armhole so I skipped the first set of decreases and started working decreases at each side of every second rows for just a couple of rows. This got me to my desired stitch count, but I only worked a third of the rows of armhole shaping that I had initially estimated. This is not a big deal because I’ll just work straight for more rows to make sure that my overall armhole is the correct depth.
Keep on playing around with your numbers until you get a TRUE reading for both stitch and row count.
This sleeve cap shaping uses a lot of maths, and it’s totally normal to feel overwhelmed by it if you’re new to knitting pattern design. If you need to take a step back from the numbers and build up your confidence, this free video is an excellent next step. It tackles all of those niggling doubts you might have about being successful as an aspiring designer. Sign up to watch it here >>
Going Straight
Now that you’ve calculated your decrease rate for the armhole shaping, you can work out how many rows to work straight before starting on the shoulder shaping.
Armhole Depth
Work out the total number of rows needed to get the correct armhole depth, rounded to an even number, using the following calculation:
Armhole depth in cm * rows per cm = total armhole rows
Spreadsheet formula: =MROUND(armhole depth in cm*row gauge per cm,2)
Replace armhole depth in cm and row gauge in cm with the appropriate cell reference. For my size 5 (XL), I used =MROUND(J17*J22,2) which means =MROUND(25.5*3,2). This gave me a result of 76 rows.
Rows Working Straight
Using our overall armhole depth in rows, we can now work out how many rows to work straight before starting the shoulder shaping. Use this calculation:
Armhole depth in rows - Rows in armhole shaping = rows to work straight
Spreadsheet formula: =armhole depth in rows-rows used in armhole shaping
This formula is telling the spreadsheet to subtract the number of rows worked in our armhole shaping from the total number of rows needed for the armhole depth. For example, in my size 5 (XL), I used =B39-B32 which means =76-18. This tells me that I need to work straight for 58 rows before the shoulder shaping. Of course, your neckline is likely to eat into those rows and we can cover neckline shaping in another blog post, if you’d like that.
Congratulations! Your armhole is now worked out.

How to Design and Grade the Sleeve Cap of a Set-In Sleeve Sweater
A set-in sleeve cap is shaped like a bell curve and comprises of an initial bind-off at each side, some decreases and a final bind-off.
We will start our calculations by figuring out the upper arm width and initial bind-off. Then, we will skip to the end and work out the final bind-off. The remaining shaping in between can be figured out based on those previous calculations.
Sleeve Cap Shaping Set Up
Upper Arm Width
Work out the upper arm width in stitches, rounded to the nearest even number, using the following formula:
(Upper arm width in cm * Stitch gauge per cm) + 2 selvedge sts = Upper arm width in sts
Spreadsheet formula: =MROUND(upper arm width in cm*stitch gauge per cm,2)+2
Remember that the selvedge stitches are there for when the sleeve cap is set into the armhole. Replace the bolded words with the appropriate cell references and drag this formula across all of your sizes. For my size 5 (XL), I used =MROUND(J16*J21,2)+2 which means =MROUND(35.5*2.2,2)+2. This gives me an upper arm width of 80 stitches.
Initial Bind-Off
This one is super easy! The bind-off on your sleeve cap will always match the bind-off used on your armhole. Use this formula to copy that number, replacing the bolded words with the appropriate cell reference: =initial bind-off from armholes
Updated Stitch Count
Work out your sleeve cap stitch count after the initial bind-off using this calculation:
Upper arm width - (Initial bind-off * 2) = New sleeve cap stitch count
Spreadsheet formula: =upper arm width in sts-(initial bind-off*2)
This formula is telling the spreadsheet to multiply the initial bind-off by 2 (since there are two bind-off sections in the sleeve cap) and then subtract it from the upper arm width in stitches. For example, my size 5 (XL) says =J44-(J45*2) which means =80-(4*2). Now I know that I have 72 stitches remaining after my initial bind-offs.
Final Bind-Off
The width of the final bind-off should measure slightly less than a quarter of the upper arm width in cm. Remember to round your measurement to the nearest 0.5 cm.
(Upper arm width in cm / 4) - 0.5 cm = Final Bind-Off Width in cm
Spreadsheet formula: =MROUND((upper arm width in cm/4)-0.5,0.5)
This formula is telling my spreadsheet to divide my upper arm width in cm by 4 and then subtract 0.5 cm from that measurement. The result is then rounded to the nearest multiple of 0.5 cm. Remember to drag the formula across all sizes! For example, in my size 5 (XL), I wrote =MROUND((J16/4)-0.5,0.5) which means =MROUND((35.5/4)-0.5,0.5). This gives me a final bind-off width of 8.5 cm.
Using our bind-off width, we can now calculate the number of stitches used in the final bind-off and round it to an even number.
Final Bind-Off Width * Stitch gauge per cm = Final bind-off in sts
Spreadsheet formula: =MROUND(final bind-off width*stitch gauge per cm,2)
For my size 5 (XL), I used =MROUND(J46*J21,2) which means =MROUND(8.5*2.2,2). This results in a final bind-off of 18 stitches.
Stitches to Decrease
To get from our stitch count, post initial bind-offs, to our final bind-off, we will need to make some decreases. Calculate how many stitches you will need to decrease at each side of the sleeve cap by using the following formula, dragging it across all sizes:
(st count After Initial Bind-Offs - final bind-off in sts)/2 = Sts to dec each side
Spreadsheet formula: =(stitch count after initial bind-offs-final bind-off in sts)/2
For my size 5 (XL), I used =(J46-J48)/2 which means =(72-18)/2. From this calculation, I know that, for this size, I need to decrease 27 stitches at each side of the sleeve cap before the final bind-off.
Sleeve Cap Length
The sleeve cap usually measure 7.5-10 cm shorter than the armhole depth, depending on the size of the bust circumference. Bust sizes up to 46” (size 5/XL on my size chart) will have sleeve caps 7.5 cm shorter than their armhole depth whilst sizes larger than 46” will have them 10 cm shorter.
Work out your sleeve cap length using this calculation, rounding it to the nearest 0.5 cm.
Armhole depth in cm - 7.5 or 10 cm depending on size = estimated sleeve cap length in cm
Spreadsheet formula: =MROUND(armhole depth in cm-7.5 or 10,0.5)
For my size 5 (XL), I used =MROUND(J17-7.5,0.5) which means =MROUND(25.5-7.5,0.5). This gives me a total sleeve cap length of 18 cm.
Now, we can estimate the number of rows in our sleeve caps using the following calculation.
(Estimated sleeve cap length in cm * Row gauge per cm) = Estimated rows in sleeve cap
Spreadsheet formula: =MROUND(estimated sleeve cap length in cm*row gauge per cm,1)
This time, round the result to the nearest whole number, and then add 1 if the resulting number is even. The total number of rows needs to be odd because you are working a total of 3 bind-off rows (2 x initial, 1 x final) and an even number of rows in between. The final bind-off is worked on a RS row.
For example, in my size 5 (XL), I used =MROUND(J50*J22,1)+1 which means =MROUND(18*3,1)+1. I added 1 to the formula because the initial result was even. Now, my estimated number of rows in the sleeve cap is 55, including all of the bind-off rows.
Rows in Sleeve Cap Shaping
Based on the estimated number of rows in our sleeve cap, we can now work out how many of those will be used in the shaping (excluding the bind-off rows).
Rows in sleeve cap - 3 bind-off rows = Rows in sleeve cap shaping
Spreadsheet formula: =rows in sleeve cap-3
Replace rows in sleeve cap with the appropriate cell reference and drag across all sizes. For my size 5 (XL) example, I used =J51-3 which means =55-3 to give me a total of 52 rows of sleeve cap shaping.
Decrease Rate for Sleeve Caps
In the book I previously mentioned, Shirley Paden likes to use multiple bind-offs to create the shaping at the very top of the sleeve cap, but I don’t like this method because I find that it makes setting in the sleeve more tricky. I prefer to use decreases to create an edge that is easier to sew in. The shaping can even become a decorative feature!
The Magic Formula for Decrease Rates
The magic formula is one of the best things I discovered when researching how to work out evenly spaced increases and decreases. I use it all the time in several parts of the pattern process, but today, we’ll be using it to figure out the decrease rate for the shaping in-between the initial and final bind-offs.
Note: the magic formula can be a little hard to get your head around at first, so if you’re struggling, you can use a magic formula calculator which will automatically help you work it out.
Divide the number of rows in the sleeve cap shaping by the stitches remaining to be decreased at each side before the final bind-off, and round it down to 0 decimal places.
Spreadsheet formula: =ROUNDDOWN((rows in sleeve cap shaping/sts remaining to dec at each side before final bind-off),0)
Replace the bolded words with the appropriate cell reference and drag across all sizes. For my size 5 (XL), I used =ROUNDDOWN((J52/J49),0) which means =ROUNDDOWN((52/27),0). This gives me a result of 1.
Then, work out the remainder from that equation.
Spreadsheet formula: =MOD(rows in sleeve cap shaping,sts remaining to dec at each side before final bind-off)
For size 5 (XL), I wrote =MOD(J52,J49) which means =MOD(52,27). The spreadsheet tells me that the remainder from the previous equation is 25.
Now, subtract the remainder from the number of stitches remaining to decrease at each side before final bind-off.
Spreadsheet formula: =sts remaining to dec at each side before final bind-off-remainder
For my size 5 (XL) I wrote =J49-J54 which means =27-25 to give me a result of 2.
Finally, add 1 to the number that we rounded down to 0 decimal places.
Spreadsheet formula: =number we rounded down to 0 decimal places+1
For my size 5 (XL) I used =J53+1 which means =J53+1. This gives me a result of 2.
Based on these calculations, you can now work out the two sets of decrease rates needed for the sleeve cap.
Dec 1 st at each end of every x rows xx times
x is the number we rounded down to 0 decimal places.
xx is the number we got when we subtracted the remainder from the number of stitches remaining to decrease at each side before final bind-off.
For my size 5 (XL) example, x is 1 and xx is 2, so my first instruction is “Dec 1 st at each end of every 1 row 2 times.”
Dec 1 st at each end of every xxx rows xxxx times
xxx is the number we got when we added 1 to the number rounded down to 0 decimal places.
xxxx is the remainder we got from the first equation.
For my size 5 (XL) example, xxx is 2 and xxxx is 25, so my second instruction is “Dec 1 st at each end of every 2 rows 25 times.”
Check Your Row/Stitch Counts
To double-check that you got the magic formula right, you will need to check both your row and stitch counts.
Spreadsheet formula: =(x*xx)+(xxx*xxxx)=rows in sleeve cap
Replace the bolded x’s and words with the appropriate cell references. For example, in my size 5 (XL), I wrote =(J57*J58)+(J59*J60)=J52 / =(1*2)+(2*25)=52. The spreadsheet responded with TRUE, which means my row count is correct.
Spreadsheet formula: =(2*xx)+(2*xxxx)=(sts remaining to dec at each side before final bind-off*2)
Replace the bolded x’s and words with the appropriate cell references. For example, in my size 5 (XL), I wrote =(2*J58)+(2*J60)=(J49*2) which means =(2*2)+(2*25)=(27*2). The spreadsheet responded with TRUE, which means that my stitch count is also correct.
If you get a FALSE reading, go back to your magic formula and try again. If you follow the process correctly, you will get a TRUE reading for both.
Using the numbers we have just calculated, we now know how many stitches to bind-off on the first two rows of the sleeve cap, followed by the sleeve cap shaping and lastly, the final bind-off.
Time to Write Your Pattern
Whew! You have just calculated everything you need to write the pattern for a set-in sleeve cap, graded to several sizes. Well done!
Remember, this version is knitted flat, but you can use very similar equations to work it out from the top-down. If you’d like me to share this in another blog post, let me know in the comments.
Discussion
What aspect of set-in sleeves do you find most difficult? Do you have any tips and tricks that make designing and grading set-in sleeves easier? Share your thoughts with The Sisterhood below so that we can support one another on our design journey.